Settings
Open Settings from the user menu (bottom of the sidebar). The dialog has five tabs.
Style Rules
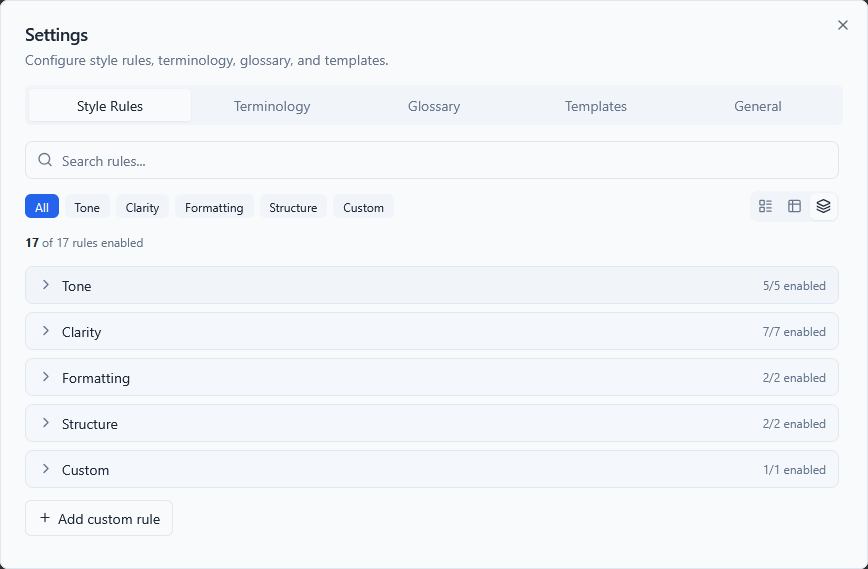
TechWrit AI ships with 25 default style rules covering common technical writing standards:
| Rule | Description |
|---|---|
| Avoid "Please" | Use direct, imperative language |
| Avoid "and/or" | Use "or" or "and" explicitly |
| Title case in titles | Distinguish main titles from subsections |
| Sentence case in headings | Capitalize only first word and proper nouns |
| Avoid "may" | Use "can" for ability, "might" for possibility |
| "Ensure" vs "confirm" | Avoid "verify," "check," "make sure," and "validate." Use "ensure" or "confirm" appropriately |
| Prefer active voice | Unless passive is clearer or actor unknown |
| Use present tense | "The system returns" not "will return" |
| Use second person | Address the reader as "you" |
| Minimize future tense | Avoid "will" for system behavior |
| Parallel structure in lists | Start all items with the same part of speech |
| Define jargon on first use | Spell out acronyms and technical terms |
| Be concise | Eliminate filler words |
| Minimize "there is/are" | Restructure these sentences |
| Consistent terminology | Same term for same concept throughout |
| Remove redundant content | Eliminate sentences that repeat the same idea as a neighbor |
| Descriptive link text | Avoid generic text like "click here" or "here" |
| Avoid "This topic describes..." | Use outcome-oriented intros instead |
| User-focused writing | Write from the user's perspective, not the product's |
| Avoid Latin abbreviations | Use "for example" not "e.g." and "that is" not "i.e." |
| Lowercase "v" for version | Use v4.8 not V4.8 |
| Short paragraphs | Keep paragraphs between 50-150 words |
| Short sentences | Keep sentences under 20 words |
| Procedures as numbered lists | Convert sequential steps from prose to numbered lists |
| No redundant headings above steps | Don't add a heading that repeats the numbered step below it |
| Screenshots need text instructions | Always pair screenshots with written instructions |
Style guide templates
The style guide selector at the top of the Style Rules tab lets you apply a pre-built rule set from a major style guide. Three templates are available:
| Template | Key differences |
|---|---|
| Microsoft Writing Style Guide | Direct tone, sentence case for H2+ subheadings, title case for H1. This is the default. |
| Google Developer Docs Style Guide | Sentence case for all headings, no "easy" or "simple," 26-word sentence limit, "select" not "click" |
| Apple Style Guide | Formal tone, no contractions, title case for all headings, Oxford comma, em dashes without spaces |
To switch style guides:
- Select a style guide from the dropdown at the top of the Style Rules tab.
- Select Apply.
- In the confirmation dialog, choose how to apply it:
- Replace — Removes all built-in rules and replaces them with the selected style guide's rules. Custom rules are preserved.
- Merge — Keeps your current rules and adds any new rules from the selected style guide that you don't already have.
The active style guide is auto-detected based on your current rule set. If your rules match a template exactly, the selector shows that template as active.
Toggle rules on or off with the switch next to each rule. Only active rules are included in the AI prompt.
Add custom rules (Pro tier) by selecting "Add custom rule" and providing a name and description.
Team rules — Team members see team-enforced rules with a lock icon. These remain active and cannot be toggled off or deleted. Personal custom rules are added below team rules and count against your personal tier limits separately.
Terminology
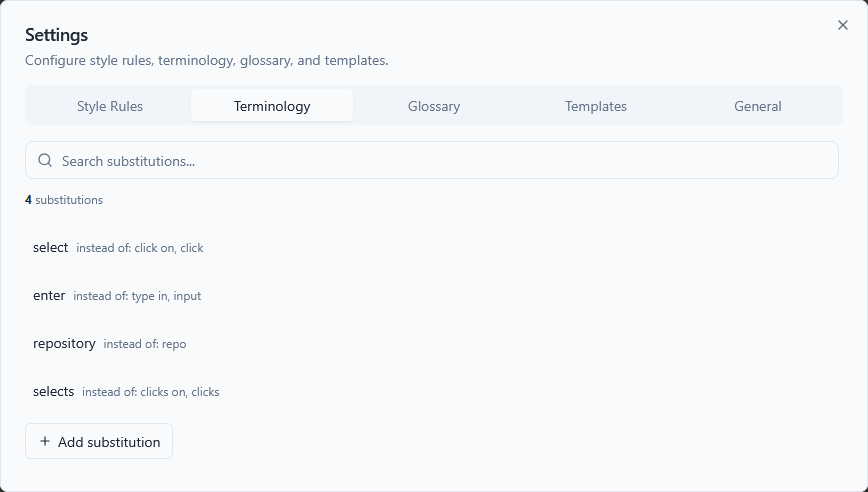
Terminology substitutions enforce word choice. Each entry has a preferred term and a list of terms to avoid.
Default substitutions:
- Use select instead of "click on", "click", "hit"
- Use enter instead of "type in", "input"
- Use repository instead of "repo"
- Use ensure instead of "make sure"
The AI enforces these during writing and rewriting. The input pane flags violations in real time.
Add, edit, or delete substitutions in this tab. The Free tier supports 3 substitutions; the Pro tier supports unlimited substitutions.
Team terminology — Team members see team-enforced substitutions with a lock icon. These cannot be edited or deleted. Personal substitutions are added separately.
Glossary
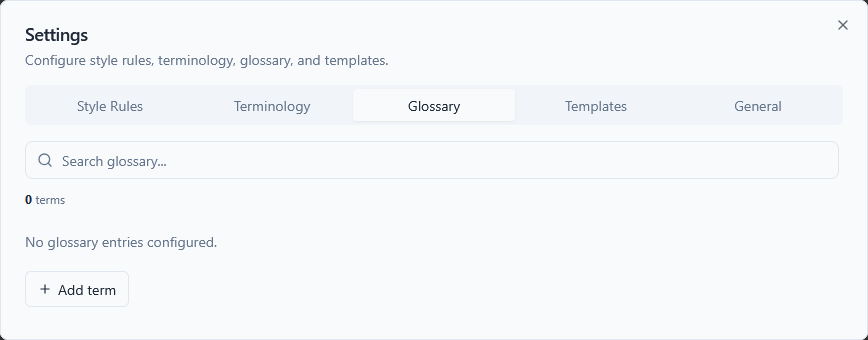
The product glossary gives the AI semantic understanding of your domain terms. Each entry includes:
- Term — The canonical name
- Definition — What it means (1-2 sentences)
- Synonyms (optional) — Alternative names the AI should flag
The AI uses glossary definitions when writing, flags synonym misuse in reviews, and generates glossary sections from your content.
Add, edit, or delete entries in this tab. The Free tier supports 3 terms; the Pro tier supports unlimited terms.
Team glossary — Team members see team-enforced glossary entries with a lock icon. These cannot be edited or deleted. Personal entries are added separately.
Prompt Library
The Prompt Library contains reusable structured prompts that pre-fill the input area with placeholders you fill in before submitting. They save time on recurring document types.
Built-in prompts
TechWrit AI ships with four built-in prompts:
| Prompt | Auto-sets | Description |
|---|---|---|
| Feature Requirements Doc | Mode: Write | Structured inputs for feature name, purpose, target users, problem statement, and business goal |
| Release Notes | Mode: Write, Type: Release notes | Inputs for product name, version, and changes — outputs categorized release notes |
| API Endpoint Doc | Mode: Write, Type: API reference | Inputs for endpoint, purpose, parameters, and response — outputs full API reference |
| Troubleshooting Guide | Mode: Write, Type: Troubleshooting guide | Inputs for product, issue description, error messages, and steps — outputs structured troubleshooting content |
Built-in prompts cannot be edited or deleted. They display in both the Prompt Library dropdown on the context bar and in the Prompt Library tab in Settings.
Using a prompt
- Select the Prompt Library dropdown in the context bar (next to Audience, Type, and Mode).
- Select a prompt from the list.
- The input area fills with the prompt content. Mode and doc type are auto-set if the prompt specifies them.
- Replace the
[placeholder]text with your actual content. - Select Go to submit.
Prompts are a one-shot action — selecting a prompt replaces the current input text.
Custom prompts
Create your own prompts in the Prompt Library tab in Settings:
- Select Add prompt.
- Enter a name and the prompt content (use
[placeholder]syntax for fields the user fills in). - Optionally set an auto-set mode and doc type.
- Select Add.
Custom prompts appear alongside built-in prompts in the Prompt Library dropdown. You can edit or delete custom prompts at any time.
General
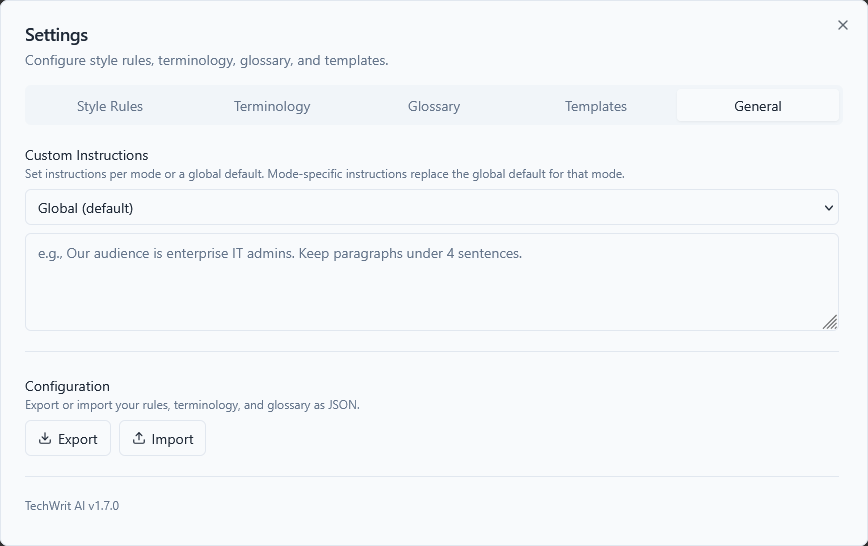
Custom Instructions
Custom instructions are freeform guidance appended to your input before each API call. You can set a global instruction that applies to all modes, or set per-mode instructions that override the global default for specific modes.
Use the mode selector dropdown to switch between editing the global instruction and any of the 17 mode-specific instructions. Modes that have custom instructions are marked with a dot indicator in the dropdown.
Examples:
- Global: "Our audience is enterprise IT admins. Keep paragraphs under 4 sentences."
- Review mode: "Focus on security concerns and OWASP compliance."
- Rewrite mode: "Always use Oxford commas. Prefer bullet lists for non-sequential content."
- Simplify mode: "Target a 6th-grade reading level for this project."
Export / Import
- Export — Downloads a
techwrit-config.jsonfile containing your rules, terminology, glossary, custom instructions (global and per-mode), and custom prompts. - Import — Loads a previously exported JSON file, replacing your current configuration.
Use export/import to share configurations across teams or back up your standards. Imported files from older versions without newer fields (like per-mode instructions or prompts) work — the missing fields are left unchanged.
See Configuration Reference for the full JSON schema, valid field values, and examples you can use to hand-edit or generate config files.